Building iWebTools
In this blog post I will show you how I build iWebTools.
iWebTools is a tool to check websites and use some tools like a JWT Decoder and a crontab converter.
Basic Design
I started with a basic design, I'm not really a designer so I tend to create simple designs.
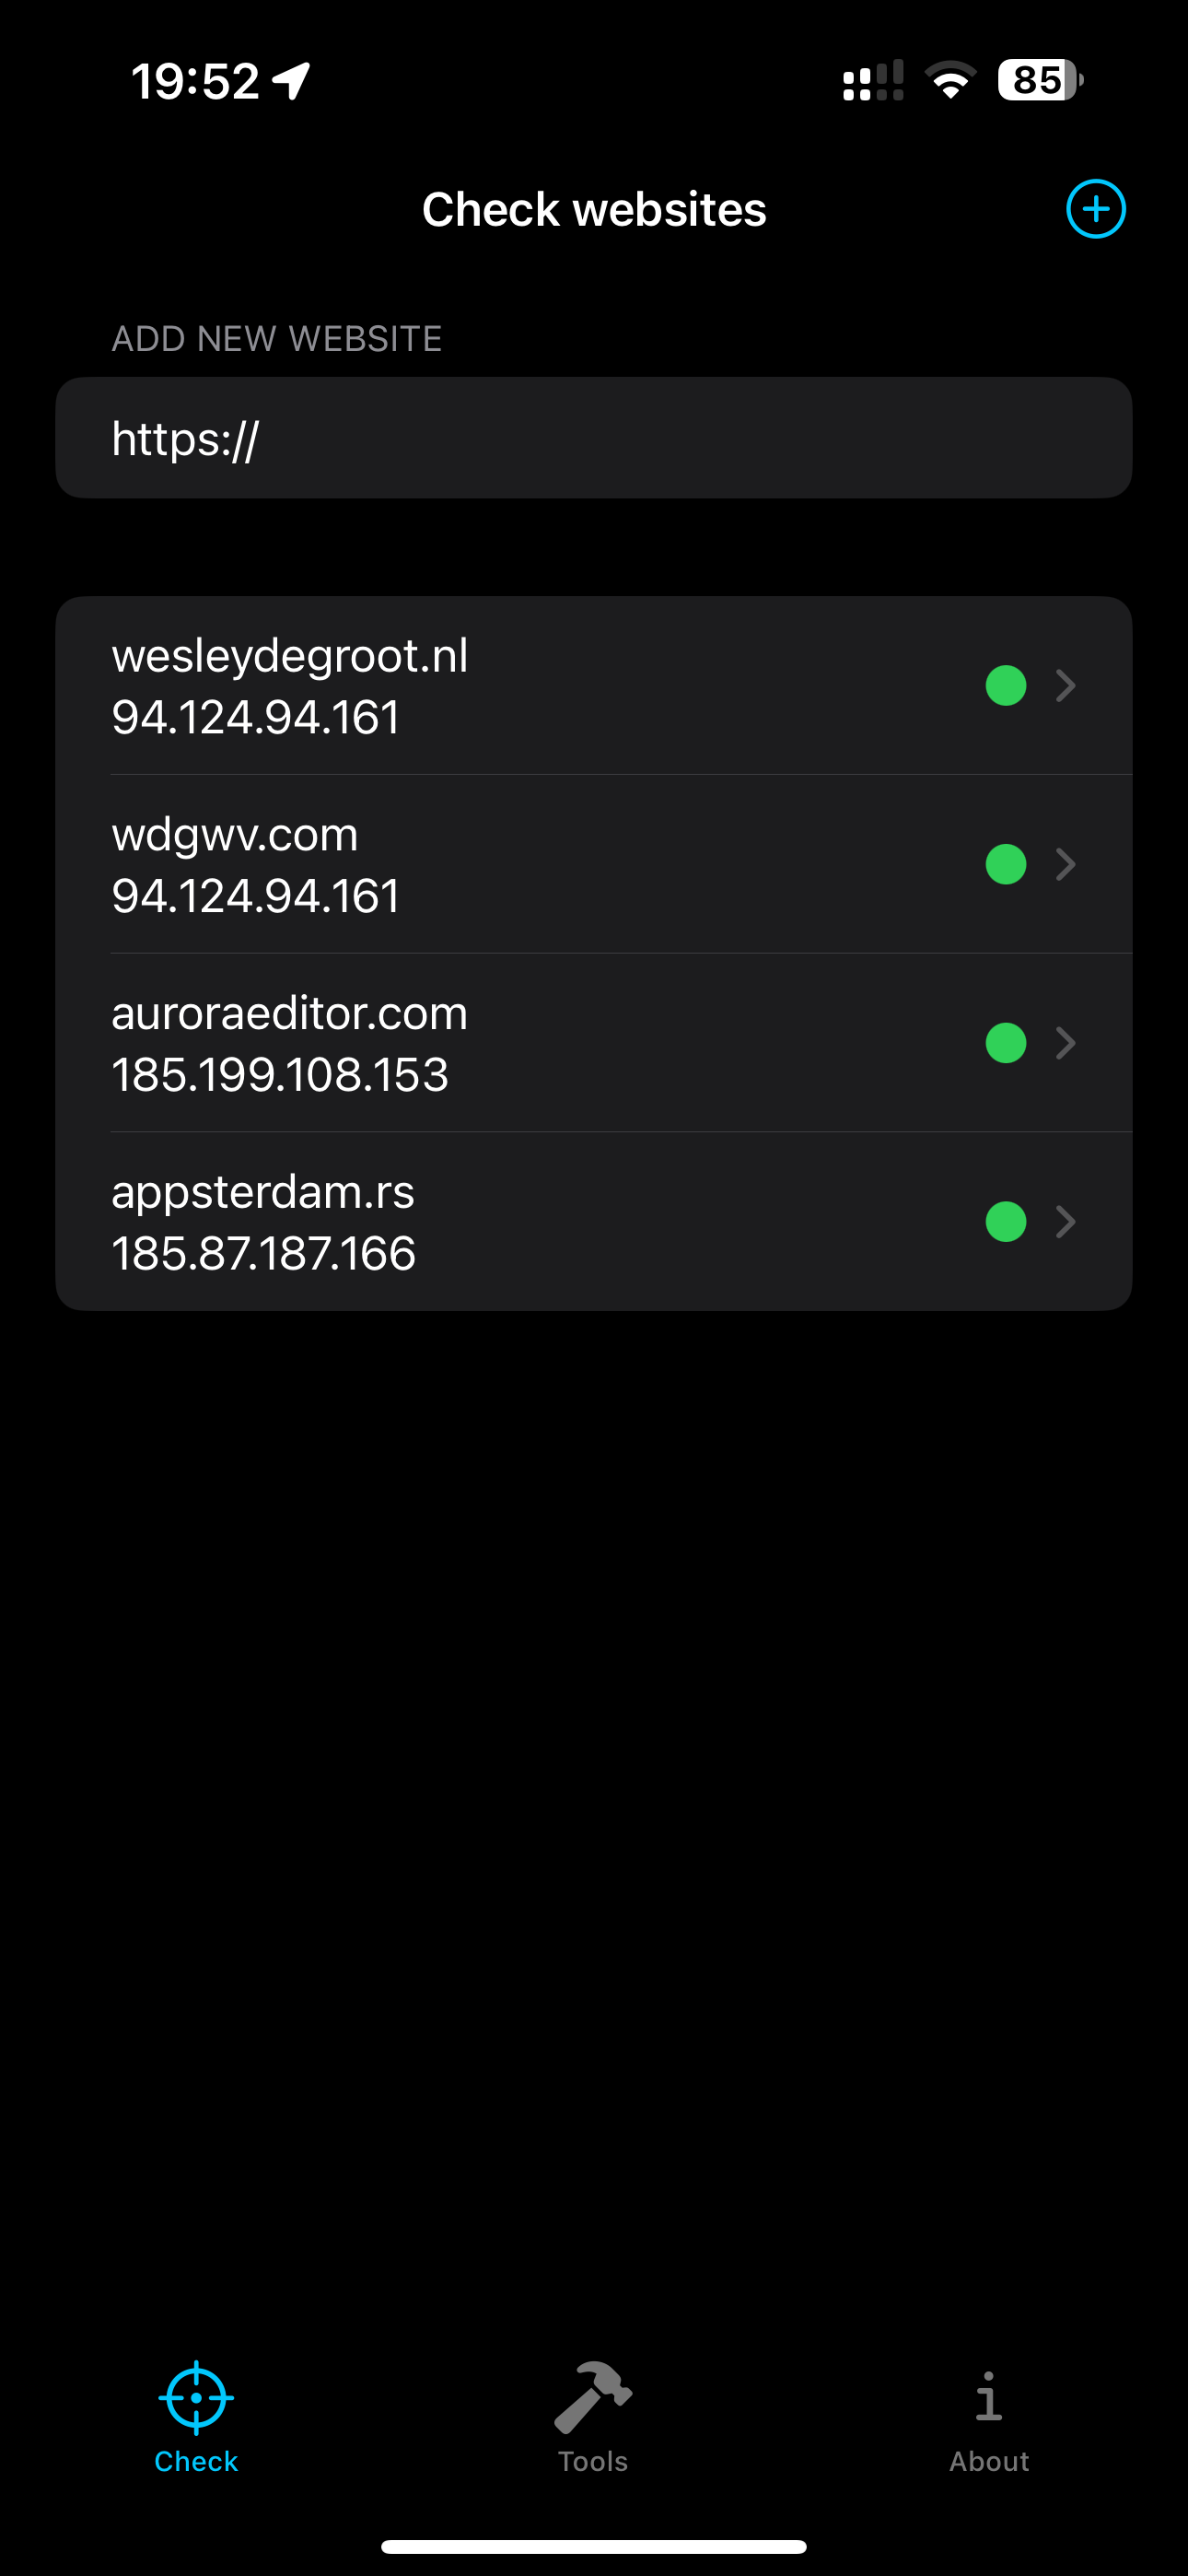
Check Websites tab
For the check websites tab I wanted to have a list of websites with their status.
The status should be a colored dot, green for online and red for offline.
The user should be able to add a website to the list.
| Design | Result |
|---|---|
|
|
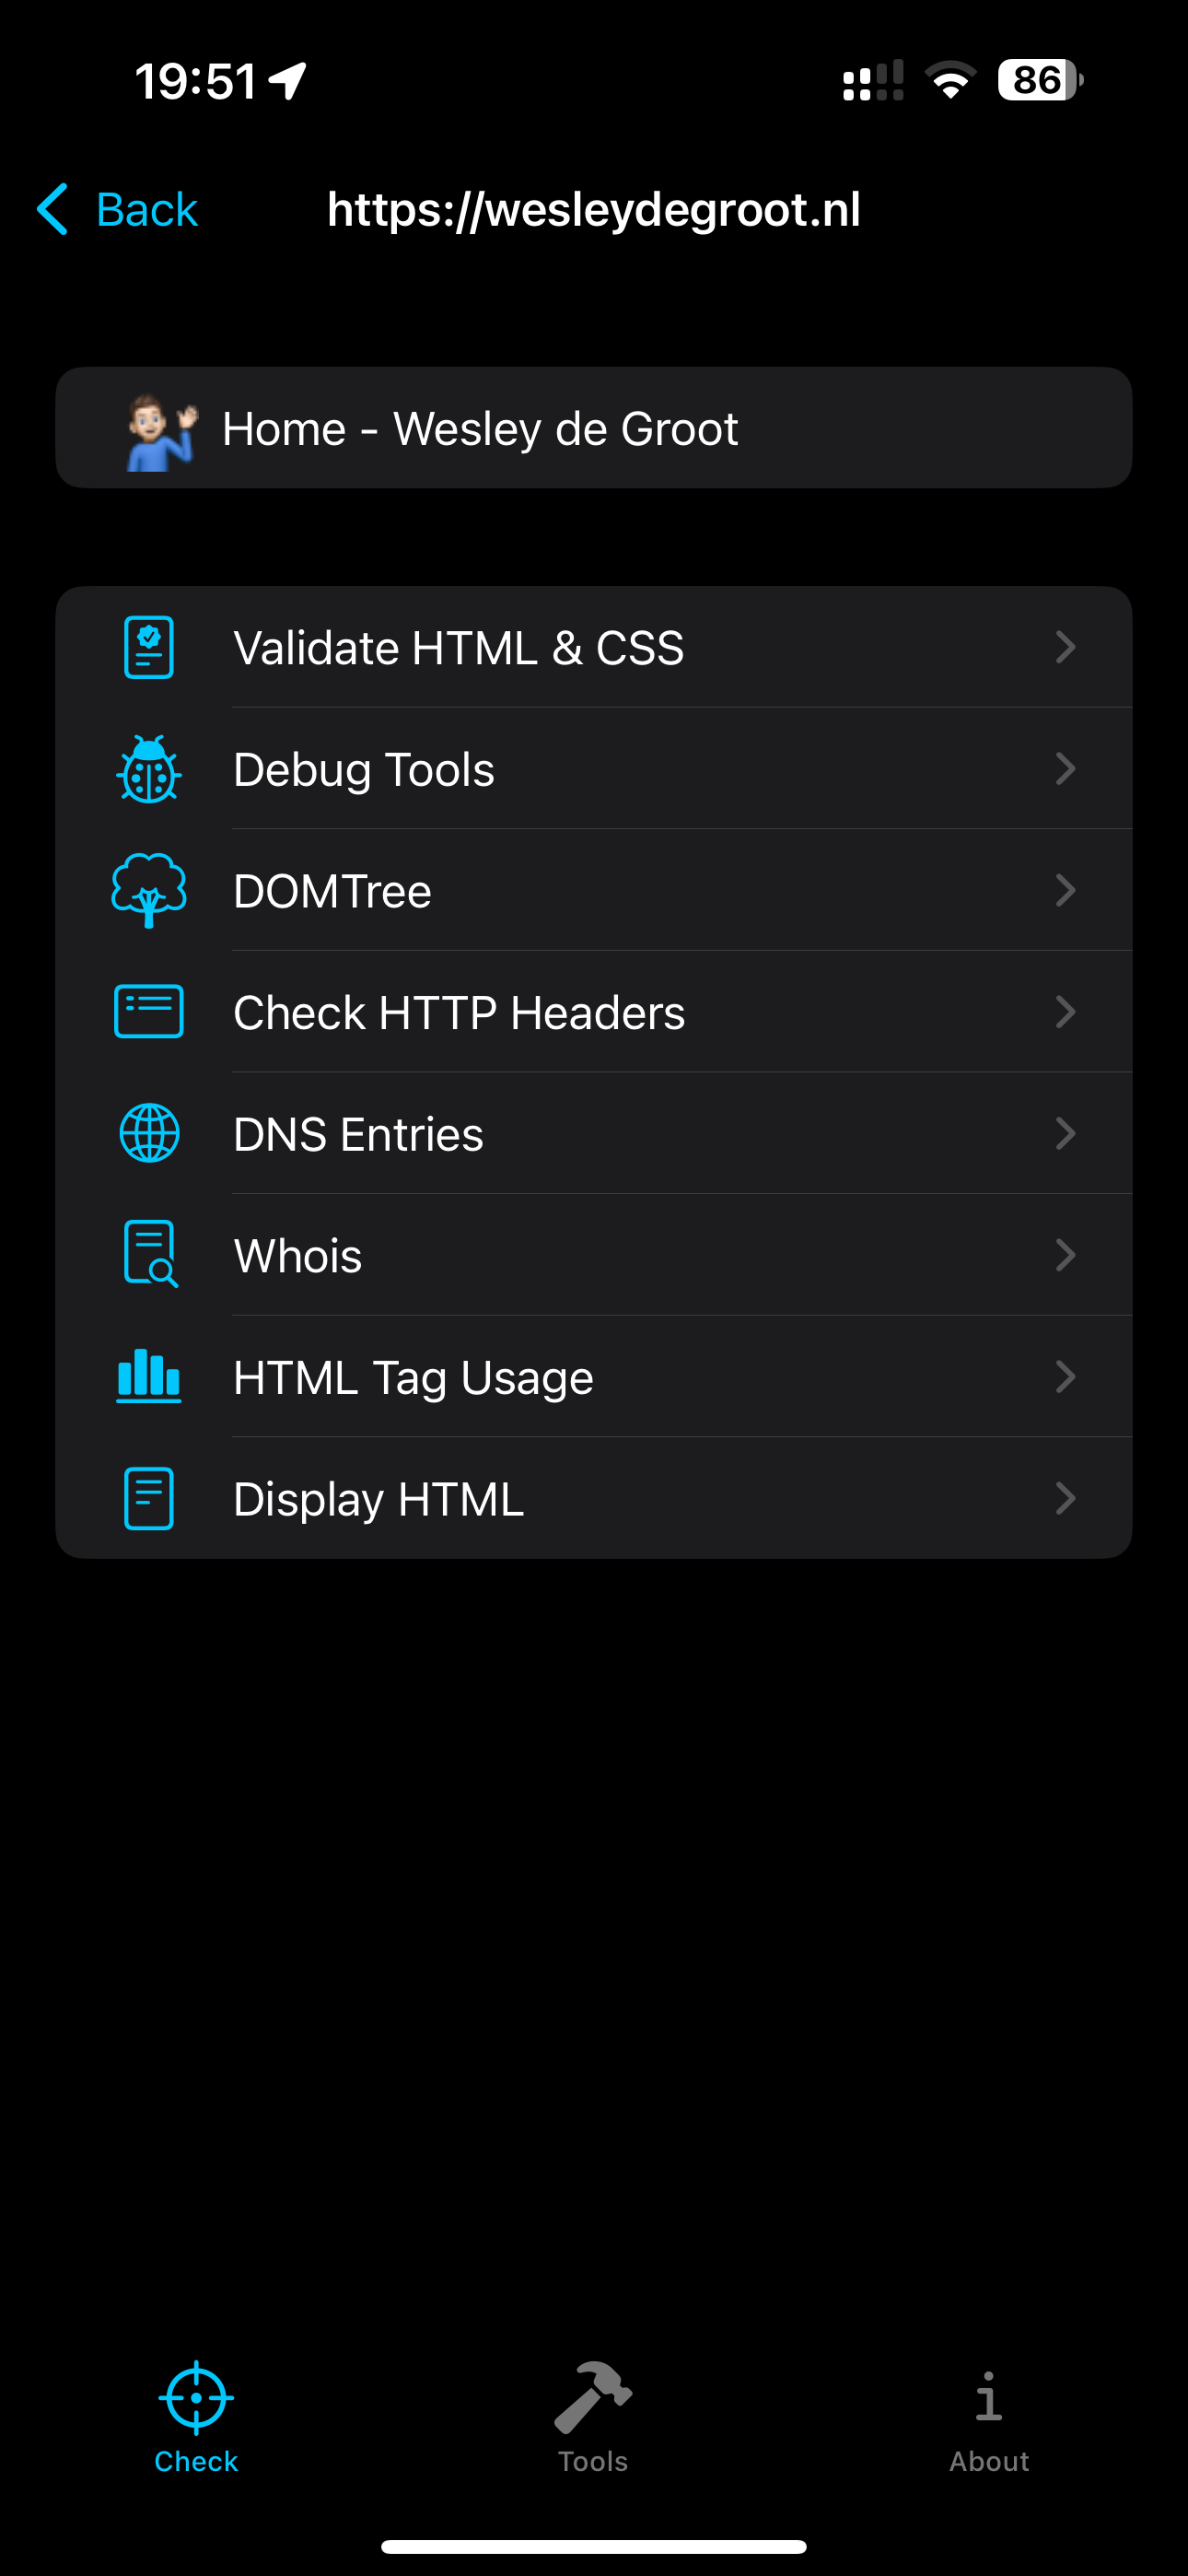
Check Websites (in a website) tab
When the user clicks on a website, the user should see more information about the website.
| Design | Result |
|---|---|
|
|
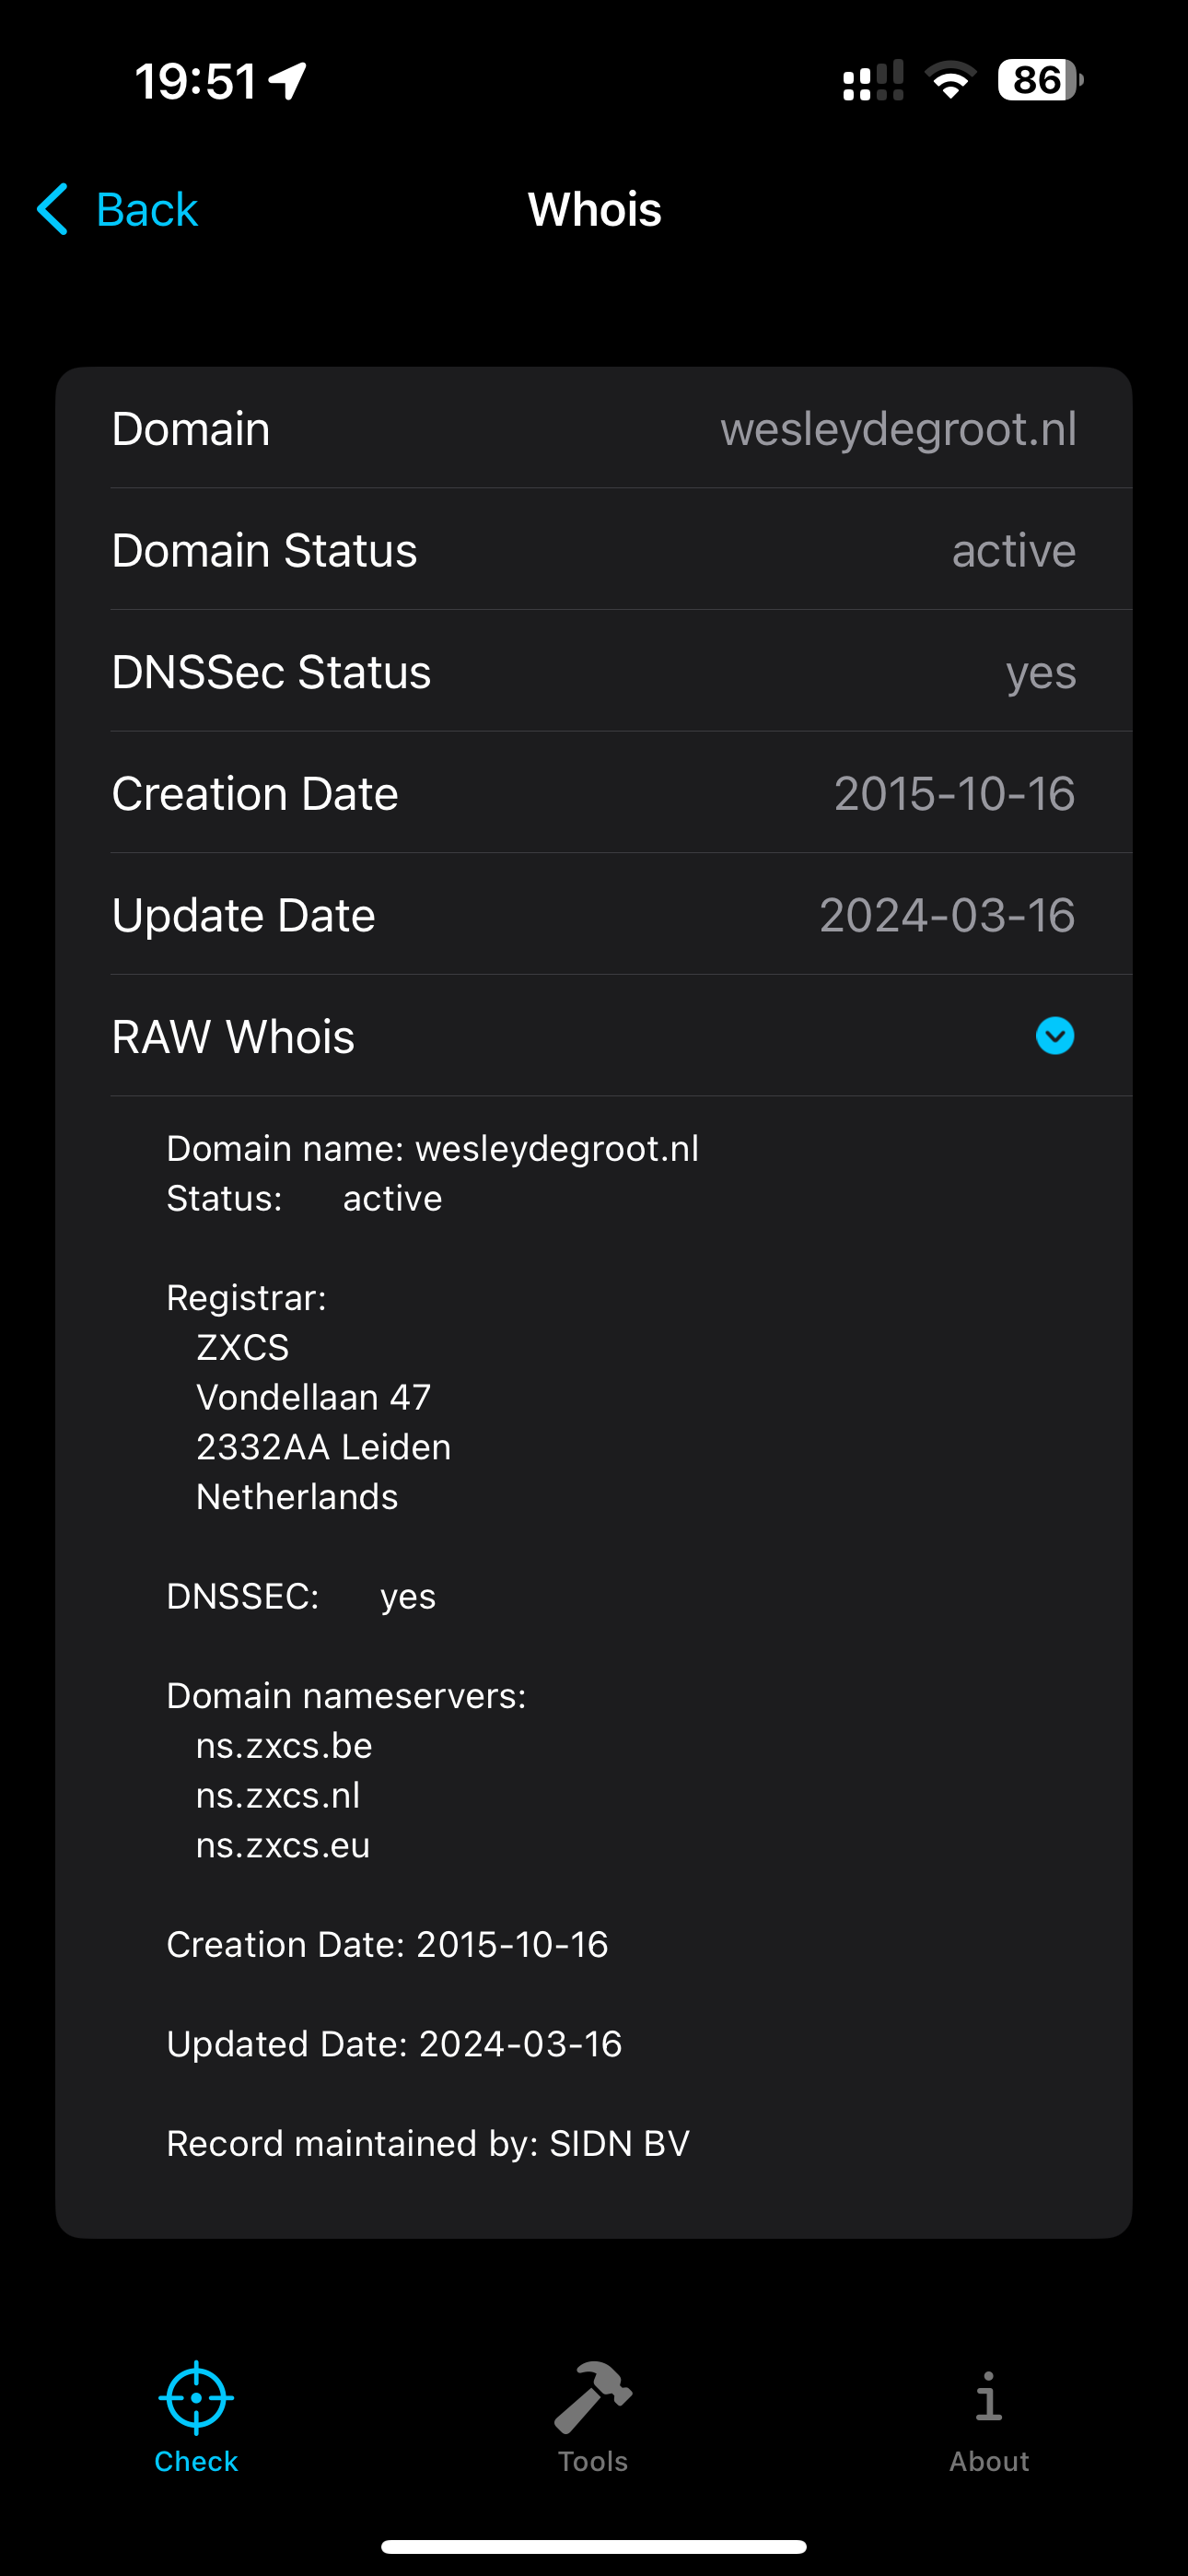
Check Websites: Whois
The Whois tab should show the whois information of the domain.
The user should be able to see the domain status, the DNSsec status, the creation date and the update date.
| Design | Result |
|---|---|
|
|
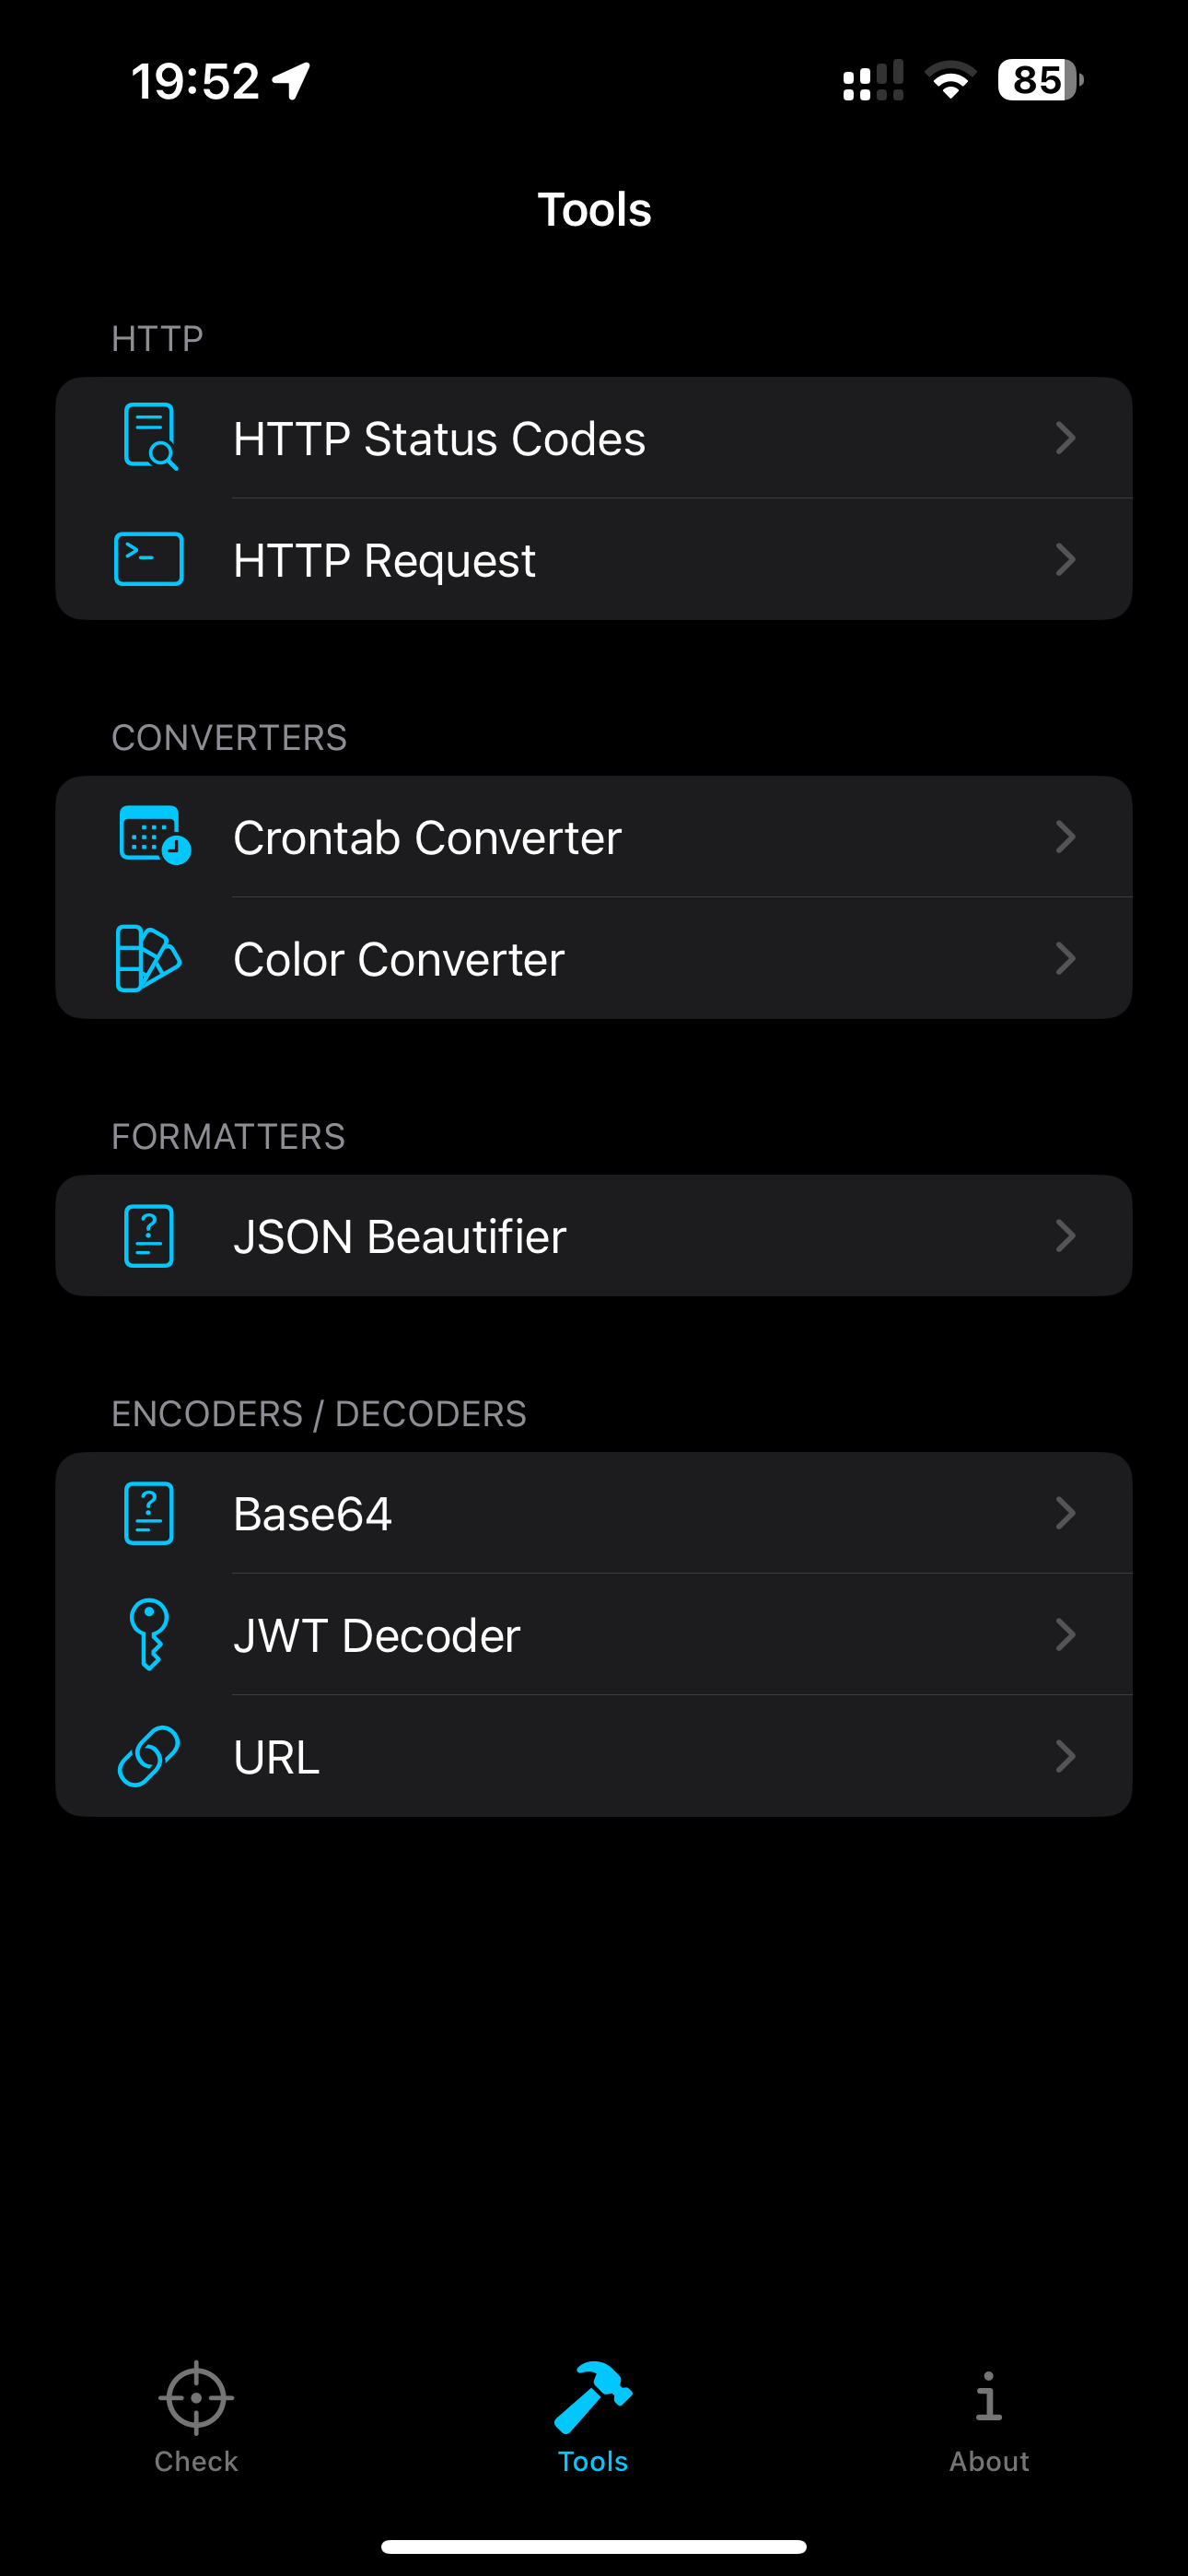
Tools tab
The tools tab should have a list of tools, the user should be able to select a tool.
The tools should be categorized in groups.
| Design | Result |
|---|---|
|
|
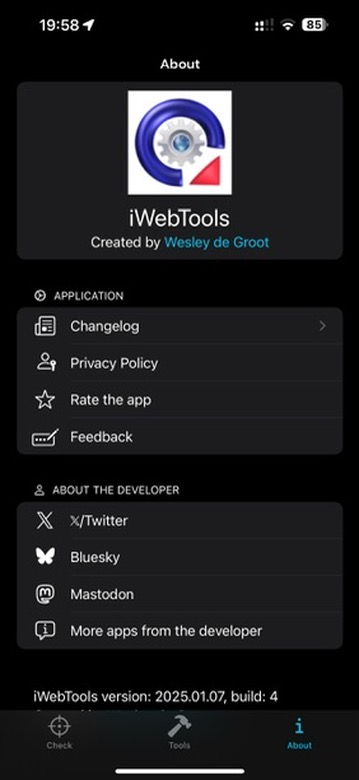
About tab
The about/settings tab is a modern design, which looks like a settings page.
The user should be able to rate the app, give feedback, read the privacy policy and see the changelog.
| Design | Result |
|---|---|
|
|
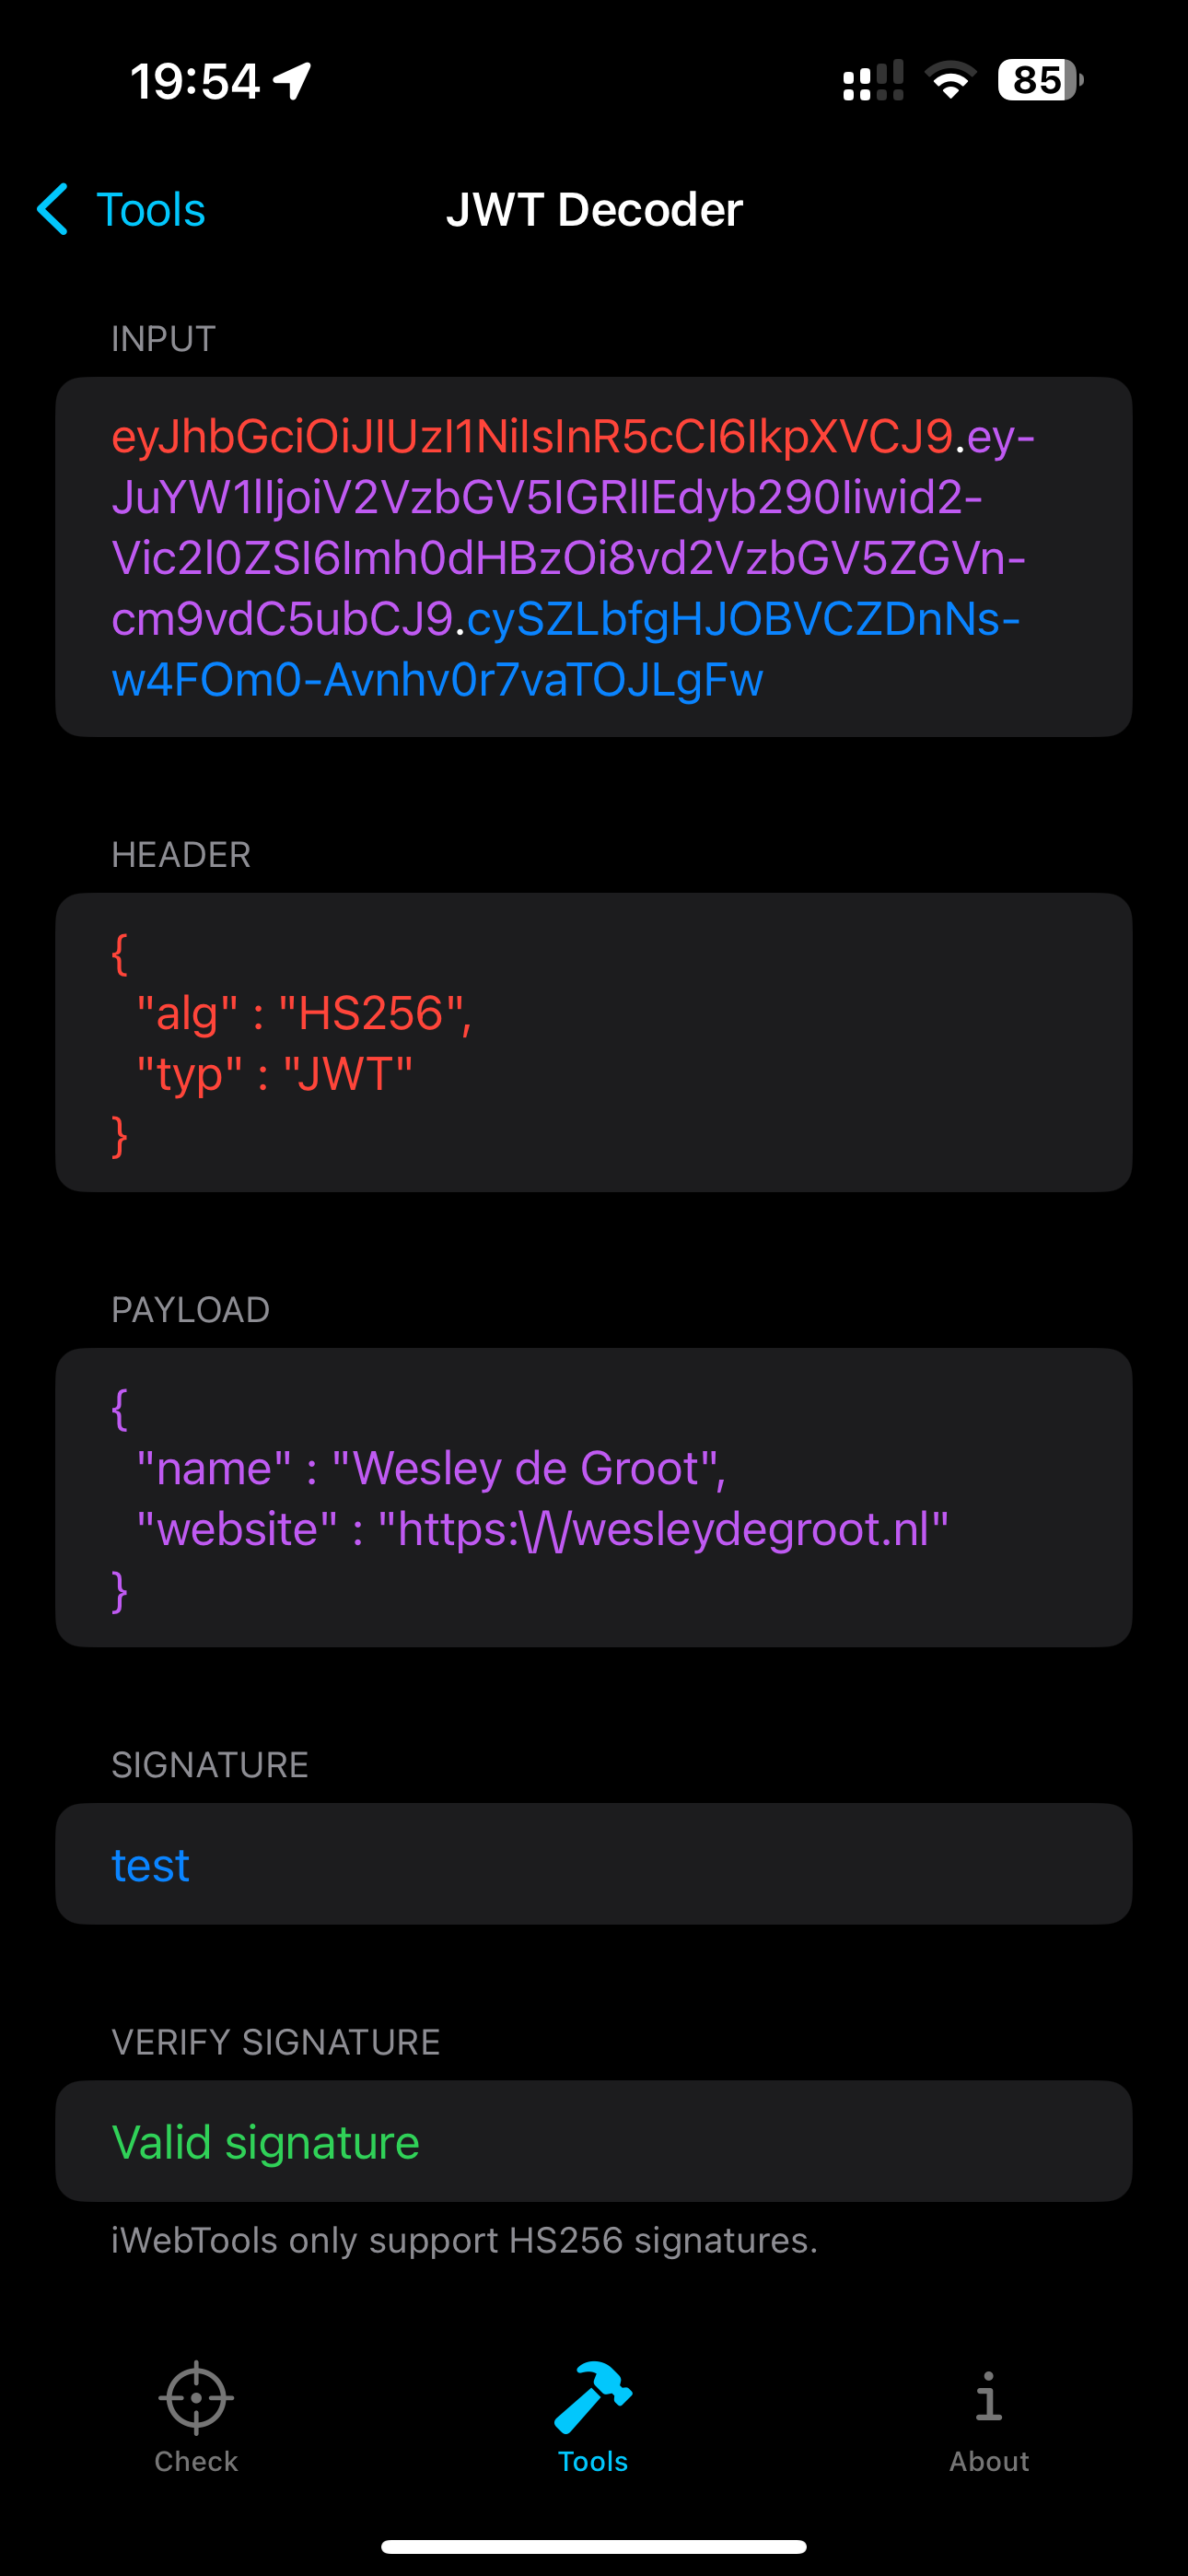
Tool: JWT Decoder
The JWT Decoder is a tool to convert a crontab to a human readable format.
This was a harder tool to build, because i wanted to have (syntax) highlighting in the input and output.
To do this, I used a ZStack to overlay the TextField with the highlighted text.
The TextField is above the highlighted text, so the user can still edit the text.
In the code below I'll explain how I did it.
import SwiftUI

struct JWTView: View {
    // Save the JWT Token
    @State private var JWTToken = ""

    var body: some View {
        List {
            Section("Input") {
                // ZStack is used to overlay the textfield with the highlighted text
                ZStack {
                    // Hightlighted text
                    Highlight(text: $JWTToken)

                    // The textfield is above the highlighted text
                    // so the user can still edit the text
                    TextField(
                        "JWT Token",
                        text: $JWTToken,
                        axis: .vertical
                    )
                    // The line limit is set to 5, so the textfield
                    // will not grow, and the space will be reserved
                    .lineLimit(5, reservesSpace: true)
                    // Since we don't want this text field to be shown,
                    // we set the background and foreground color to clear
                    .background(Color.clear)
                    .foregroundStyle(.clear)
                }
            }
        }
    }


    @ViewBuilder
    func Highlight(text: Binding<String>) -> some View {
        // Split the JWT Token into 3 parts
        let tokenData = JWTToken.components(separatedBy: ".")

        // Check if the token is not empty and has 3 parts
        if !JWTToken.isEmpty, tokenData.count == 3 {
            // Create a group to combine the 3 parts
            Group {
                if #available(iOS 17.0, *) {
                    // Part 1 is red
                    Text(tokenData[0])
                        .foregroundStyle(.red)
                    + Text(".") +
                    // Part 2 is purple
                    Text(tokenData[1])
                        .foregroundStyle(.purple)
                    + Text(".") +
                    // Part 3 (Signature) is blue
                    Text(tokenData[2])
                        .foregroundStyle(.blue)
                } else {
                    // No iOS 17.0, so we use the fallback
                    FallbackView(text: text)
                }
            }
            // The line limit is set to 5, so the line
            // will not grow, and the space will be reserved
            .lineLimit(5, reservesSpace: true)
            // The text is aligned to the leading side (left) in most cases
            .multilineTextAlignment(.leading)
            // Make the text fill the width of the screen
            .frame(maxWidth: .infinity, alignment: .leading)
        } else {
            // The token is empty or has less/more than 3 parts
            FallbackView(text: text)
        }
    }

    @ViewBuilder
    func FallbackView(text: Binding<String>) -> some View {
        Text(text.wrappedValue)
            // The line limit is set to 5, so the line
            // will not grow, and the space will be reserved
            .lineLimit(5, reservesSpace: true)
            // The text is aligned to the leading side (left) in most cases
            .multilineTextAlignment(.leading)
            // Make the text fill the width of the screen
            .frame(maxWidth: .infinity, alignment: .leading)
    }
Click here to see the end result (screenshot)
Tool: crontab converter
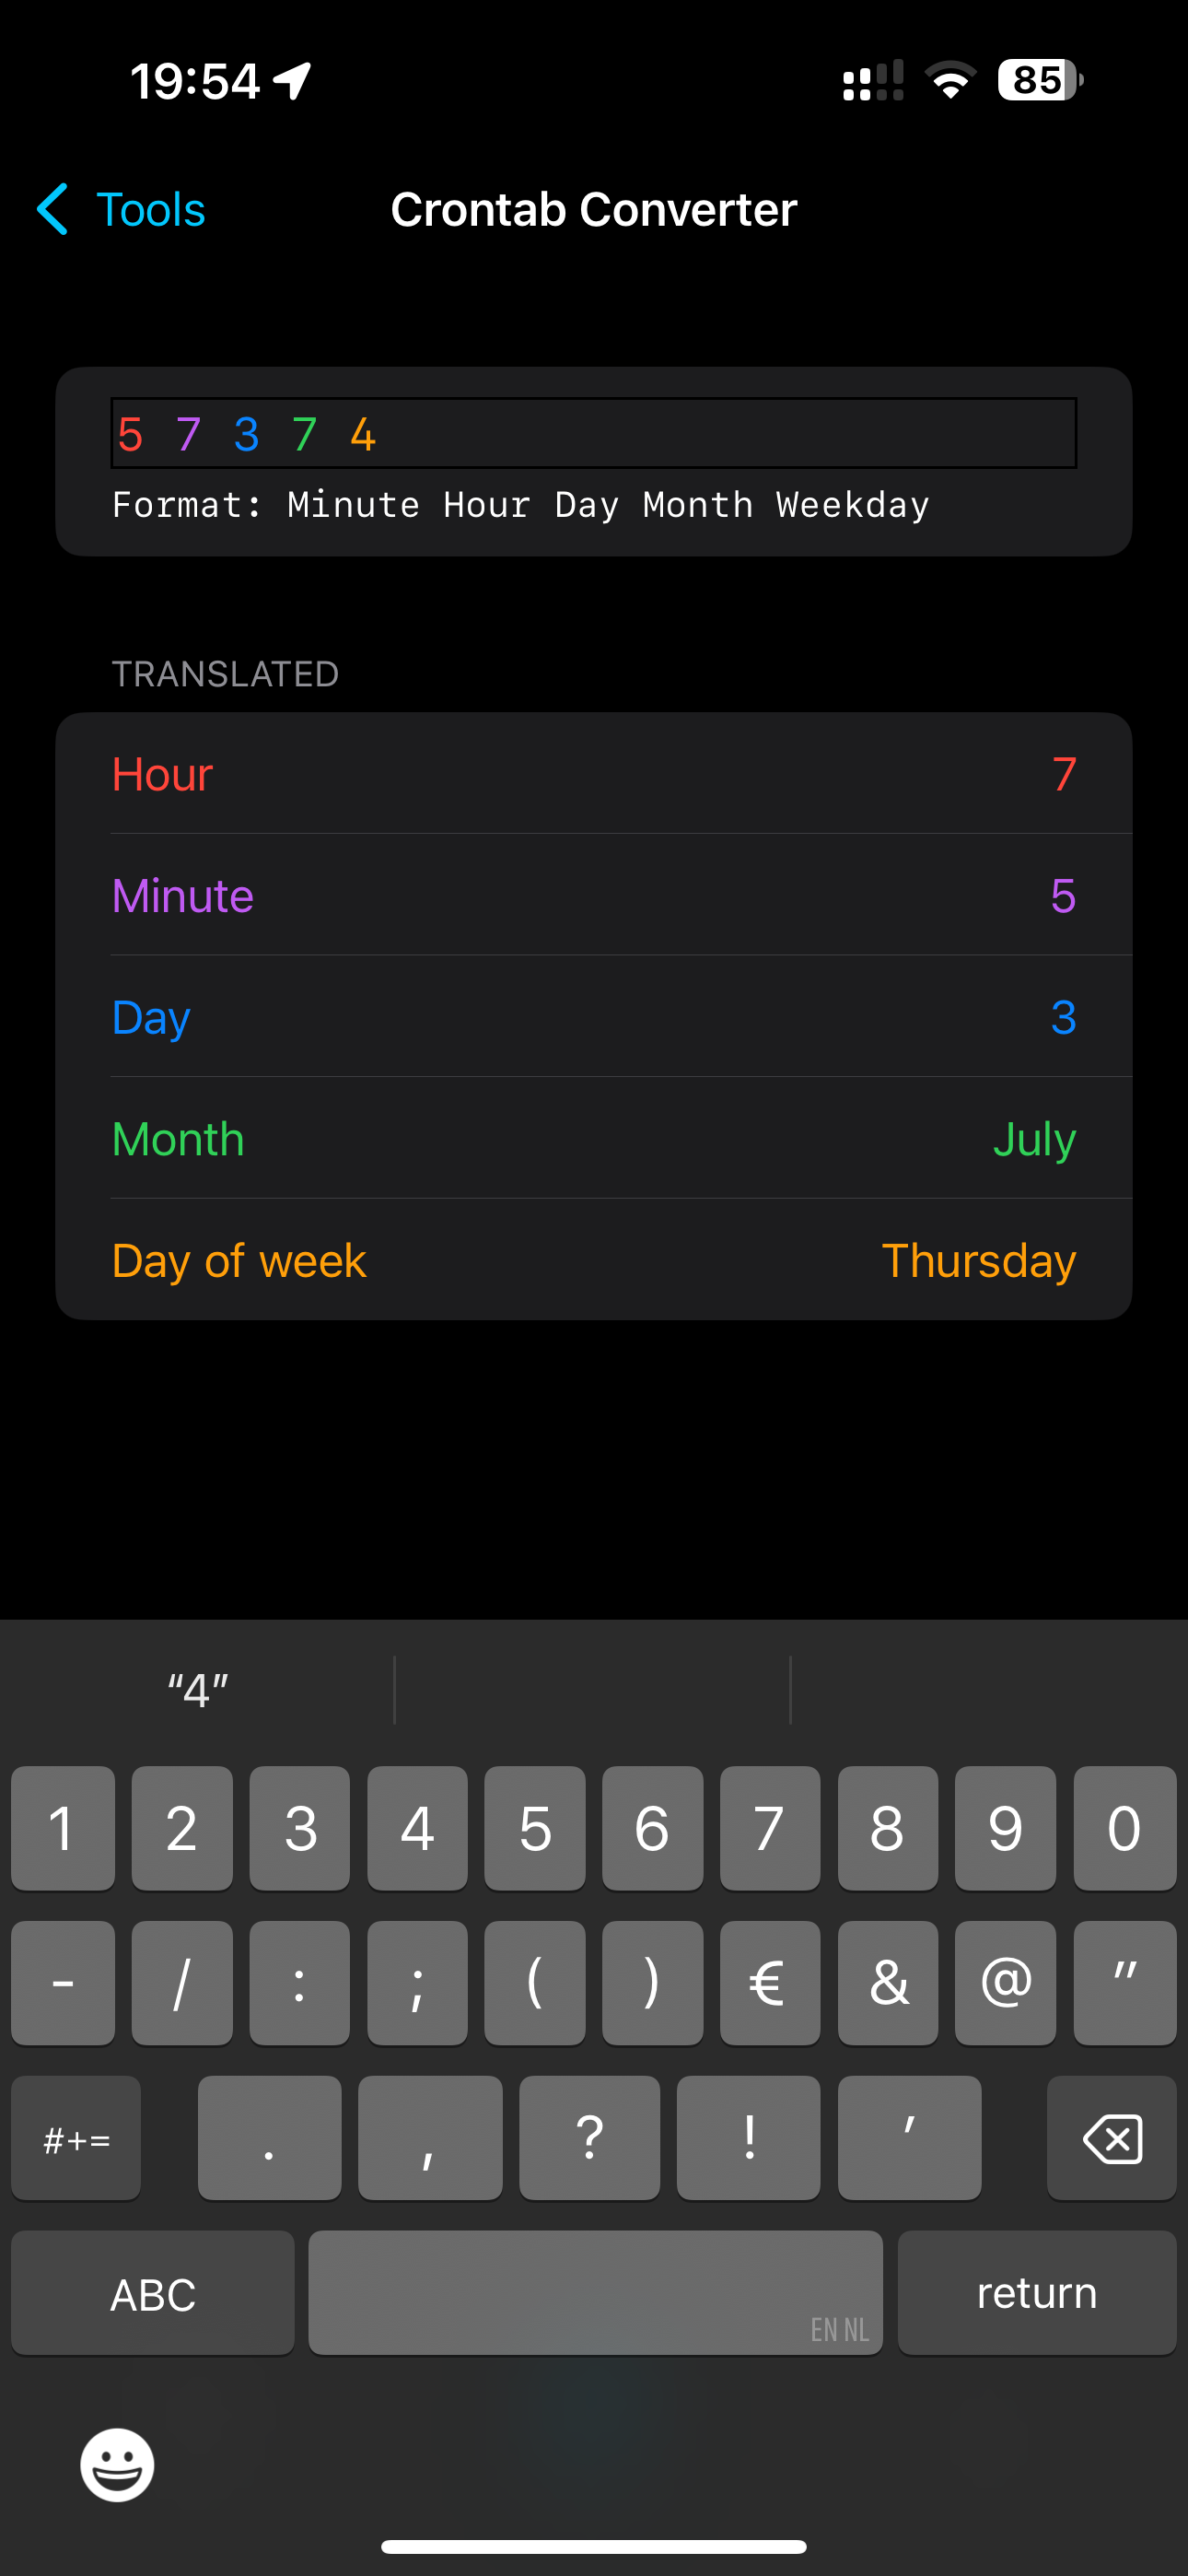
The crontab converter is a tool to convert a crontab to a human readable format.
I made this tool also available as a open source project on GitHub, so other developers can use it in their projects.
The code below is a fully working example of the crontab converter and how to use the SwiftCronParser library, this is used in iWebtools.
import SwiftUI
import SwiftCronParser

struct CronConverterView: View {
    /// The input text
    @State
    private var cronText = ""

    /// The parsed cron time/converted data
    @State
    private var cronTime: SwiftCronParser.CronTime?

    var body: some View {
        List {
            VStack(alignment: .leading) {
                ZStack {
                    Highlight(text: $cronText)
                        .padding(2)
                        .monospaced()

                    TextField(
                        "Cron text",
                        text: $cronText
                    )
                    .padding(2)
                    .monospaced()
                    .lineLimit(1, reservesSpace: true)
                    .background(Color.clear)
                    .foregroundStyle(.clear)
                }
                .border(.black, width: 1)

                Text("Format: Minute Hour Day Month Weekday")
                    .monospaced()
                    .lineLimit(1)
                    .font(.footnote)
            }

            Section("Translated") {
                // Check if the cron time is not nil (we habe parsed the value)
                if let cronTime,
                    // Check if there is no error
                    cronTime.error == nil,
                    // Check if the cron time is valid
                    cronTime.isValid {
                    LabeledContent(
                        "Hour",
                        value: "\(cronTime.hour.map { String($0) }.joined(separator: ","))"
                    )
                    .foregroundStyle(.red)
                    LabeledContent(
                        "Minute",
                        value: "\(cronTime.minute.map { String($0) }.joined(separator: ","))"
                    )
                    .foregroundStyle(.purple)
                    LabeledContent(
                        "Day",
                        value: "\(cronTime.day.map { String($0) }.joined(separator: ","))"
                    )
                    .foregroundStyle(.blue)
                    LabeledContent(
                        "Month",
                        value: "\(cronTime.months.joined(separator: ", "))"
                    )
                    .foregroundStyle(.green)
                    LabeledContent(
                        "Day of week",
                        value: "\(cronTime.daysOfWeek.joined(separator: ", "))"
                    )
                    .foregroundStyle(.orange)
                } else {
                    if !cronText.isEmpty, let error = cronTime?.error {
                        Text(error)
                    }
                }
            }
        }
        .onChange(of: cronText) { val in
            // When the cron text changes, we parse the text
            cronTime = SwiftCronParser(input: cronText).parse()
        }
        .task {
#if DEBUG
            // If we are in debug mode, we set the cron text to a default value
            // so we can test the converter without typing
            cronText = "5 4 * * *"
            cronTime = SwiftCronParser(input: cronText).parse()
#endif
        }
        .navigationTitle("Crontab Converter")
        .navigationBarTitleDisplayMode(.inline)
    }

    // Here we do the same as in the JWT Decoder
    // We highlight if the input can be separated by a space into 5 parts
    @ViewBuilder
    func Highlight(text: Binding<String>) -> some View {
        let tokenData = text.wrappedValue.components(separatedBy: " ")
        if !text.wrappedValue.isEmpty,
           tokenData.count == 5 {
            Group {
                if #available(iOS 17.0, *) {
                    Text(tokenData[0])
                        .foregroundStyle(.red)
                    + Text(" ") +
                    Text(tokenData[1])
                        .foregroundStyle(.purple)
                    + Text(" ") +
                    Text(tokenData[2])
                        .foregroundStyle(.blue)
                    + Text(" ") +
                    Text(tokenData[3])
                        .foregroundStyle(.green)
                    + Text(" ") +
                    Text(tokenData[4])
                        .foregroundStyle(.orange)
                } else {
                    FallbackView(text: text)
                }
            }
            .lineLimit(1, reservesSpace: true)
            .multilineTextAlignment(.leading)
            .frame(maxWidth: .infinity, alignment: .leading)
        } else {
            FallbackView(text: text)
        }
    }

    @ViewBuilder
    func FallbackView(text: Binding<String>) -> some View {
        Text(text.wrappedValue)
            .lineLimit(1, reservesSpace: true)
            .multilineTextAlignment(.leading)
            .frame(maxWidth: .infinity, alignment: .leading)
    }
}
Click here to see the end result (screenshot)
Download iWebTools
You can download iWebTools from the AppStore
Ideas
If you have any ideas for iWebTools, please let me know in the comments below!
Read more
- Thermal States on iOS • 3 minutes reading time.
- Exploring ControlGroup in SwiftUI • 3 minutes reading time.
- Dutch.swift • 2 minutes reading time.
Share
Share Bluesky Mastodon Twitter LinkedIn Facebook
